Do you have that one loose pigment that you bought because you loved the color, but when you put it on, it just wasn't your thing? Or have a collection of pigments you found out were not safe, but you can't bare to throw them out (like me...)?
Frankening might be your solution. What is frankening? In simple gal's speak, it is mixing up your own nail polish using pigments and/or various nail polishes. You can also do this by simply mixing different nail polishes until you get that perfect shade.
What will you need?
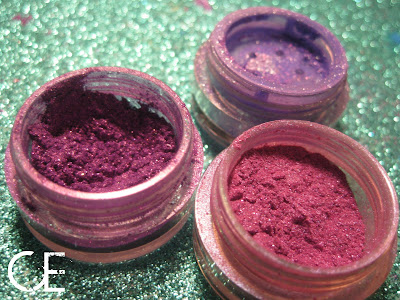
For this tutorial, I used a clear, glittery nail polish, a piece of computer paper, and the pigments you wish to franken. I planned on frankening the blue pigment in the front, however, I grabbed a few other colors to add in small amounts to perfect my color.
The blue I used was an unnamed Glittersniffer blue. As you can see, the pigment was not mixed very well, so I took the end of a brush and mixed up the pigment to be sure it would mix in the polish properly.
The green I used is Glittersniffer's Zombie Girl. I only used a small amount of this to color correct and add shimmer, since the blue pigment was matte.
I used a pinch of Glittersniffer's Crushed Diamonds to add a little shimmer and lighten up the pigment a little.
Let's get started!
Since the opening to the nail polish base I used is relatively small, I am used a small piece of paper to funnel the pigment into the opening.
I took a shred of computer paper and pinched the end of it, similar to the way you would if you were going to but some kiddy glitter on a kindergarden glue & glitter masterpiece.
Dump out your pigment of choice on to the paper near the fold.
You can tap the pigment into the bottle, or, if you are not a graceful person....
You can simply brush the pigment into the bottle.
After I got the color right, I added just a touch of loose blue glitter I bought from Hot Topic a few years ago.
Since the polish was a cheap glitter polish, the glitter initailly in the polish made the finish a bit bumpy. Add a clear top coat.. Bam! problem gone!
I also tried this on a high quality polish I had. It was a small sample bottle, but I couldn't help but try.
I used a SUPER sheer orange with lots of glitter. I used this over darker colors, you couldn't see the orange... AT ALL, just the silver glitter. So, I figured I would take a risk and use some purple pigments.
I used Glittersniffer Sammy Jo, Suess Purple, and Smash.
The orange tint didn't show through at all! The application was smooth, no top coat needed!!
What did I learn?
It is really better to go with a decent quality nail polish over a cheapy, and SHAKE the life out of the bottles!! They can never be mixed enough!!


I love this! It's a great way to use up colors that you might be tired of on your eyes or that may be unsafe for your peepers.
ReplyDeleteThe purple one looks really pretty!
ReplyDeleteI am totally doing this!!! I hardly ever polish my own nails but can now bring a cool color w/ me to get my Pedi.
ReplyDeleteGROOVY!
i am doing this tonight!!
ReplyDeletefer sure!
thanks!!
This is awesome! :D Great post!
ReplyDeleteWishing I hadn't just trashed my box of 100+ different glittersniffer colors... lol. I just couldn't stand to look at them anymore. :P
ReplyDelete