
Hey guys!! Finally!! This is a tutorial of the look I sported on new years eve this year: http://beautybyeige.blogspot.com/2011/01/eoth-new-years-edition.html
DIFFICULTY: 3.75 / 5

This look is a bit dramatic for everyday wear, but can be a really kick ass look for a party. To achieve this look, we are going to need a few things....

What I used:
Madd Style Cosmetics' Spooky Girl - any deep black would work. Use what you have!
Glittersniffer Cosmetics' Gloom Cloud - Any silvery grey will work. I don't have it yet, but MSC Mr. Roboto would be perfect.
Loose COSMETIC GRADE glitter - If you use anything larger, you risk scratching your corneas. ouch!
Madd Style Cosmetics' Dazzle Dust - for a little extra sparkle. This is just extra - body/cosmetic glitter will work too!
Madd Style Cosmetics' Xray Spex - I used this as a highlighter. Any white or light colored semi-opaque will work just fine! Go for the lighter colors here, we want this to be DRAMATIC!!

Whatever you use for your face routine, but be sure to grab some concealer! All I use is a mineral veil, seen above. My concealer is Maybelline's Dream Matte Mousse in Ivory. The veil is by avon. :)

Eye primer or concealer. I used E.L.F Eyelid Primer. :)

A base. This will insure your shadow won't fade. I used NYX Jumbo Pencil in Milk.

Mascara, and whatever you use for liner! It might be a good idea to use a liquid liner for long time wear and hardcore partying. ;) I use Maybelline's Line Express pencil in Ebony Black, Revlon's Colorstay liquid liner in Blackest Black, and Rimmel's Glam Eyes mascara.

Tape... to get a dramatic line on the edges of your eyes. :) You can also use this to clean up fall out!

False lashes and lash glue, if you want!
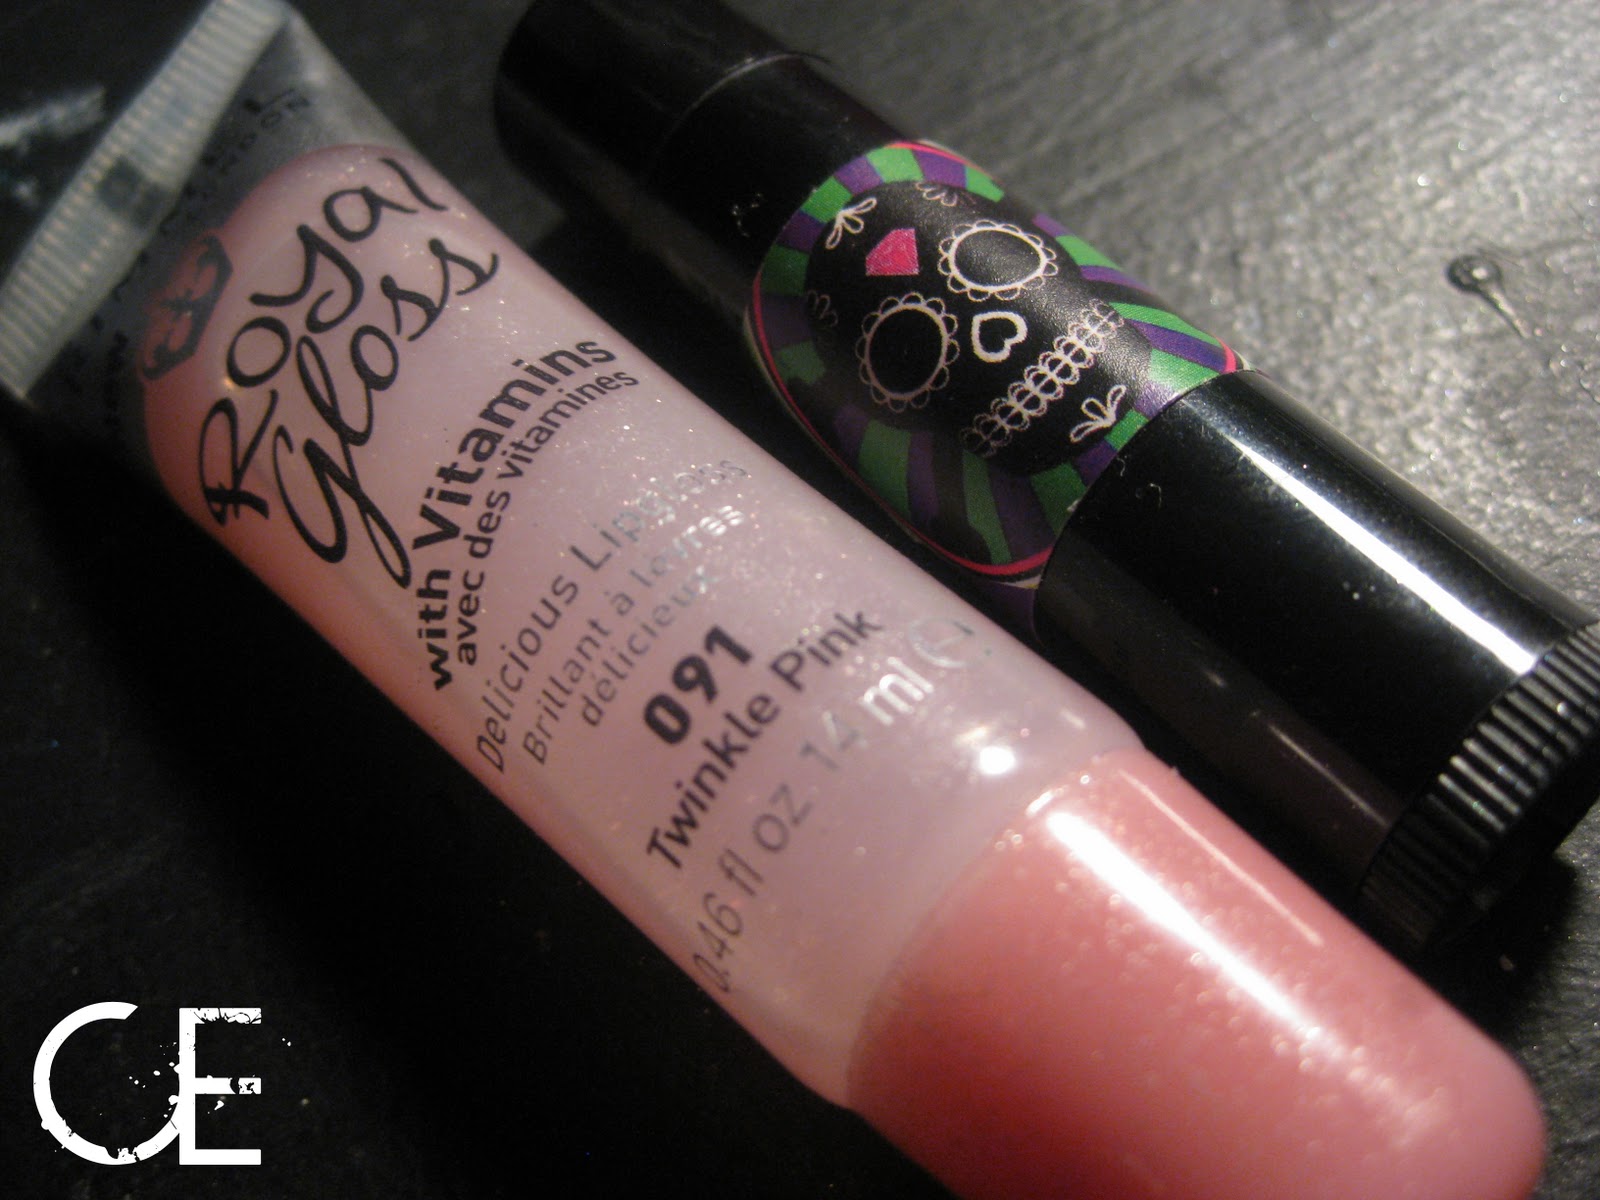
A good lip balm and gloss. I used Rimmel's Royal Gloss 091, and Madd Style's Lip Bomb "The Dude" - What's better than Kahlua balm for a party!?

Something to adhere the glitter with. In the original look I did new years eve, I used a tacky clear lip gloss, since I didn't have my Awesomesauce from Madd Style yet. Lip gloss will work fine, but if you want to give Awesomesauce a try - go for it! For this tutorial to be "true" to the original look, I used the lipgloss route!

BRUSHES!!
I used: a large puffy face brush, a small detail brush, an old concealer brush, a puffy brush to apply my Dazzle Dust, a small shadow brush, a puffy highlighter brush, and a medium shadow brush. You do NOT need to use this many. I just go a little overboard. :)

Before you do anything, give your lips some moisture. They will thank you later. Periodically, while you are applying your makeup, remember to rub your lippies together.

Prime your lids. As mentioned, I used E.L.F. eyelid primer. Apply to your lid, then (by patting with your finger) spread primer evenly and let dry.

Now that we have a primed eye, we are ready for the fun stuff. ;)

With your NYX Milk, apply to the eyelid like you are drawing with a crayon. You can use a black base for this too, but I am just no good with my black base and this look. Using Milk might seem a little redundant since we are partially covering it with black, but I just use it for a little extra color insurance.

Using your finger, blend out the base so that it is even and not thick on your entire lid, upwards. On the outer corner, blend really well, so that it is almost sheer.

Grab a small amount of tape as seen above, one for each eye.

For this look, I created a really wide angle with the tape. I angled it up in an invisible line towards the area in which the top of my ear connects to my noggin. I can't stand the tape too close to my lower lashline, so I put it a little below, as you can see. :)

Using a small shadow brush, apply the silvery color on the inner half of your lid. Don't worry about perfection, this is going to be a base for our glitter. ALWAYS pat on, don't drag, especially with glitters or the black. It will just lead to fall out all over that pretty little mug.

Working from the tape, apply the black pigment with a medium shadow brush, and work inward following the shape of your eye.

Apply more black as needed.....

... and apply more black...

Once you get close to the silver pigment, start to blend the colors together. Since they are both relatively close in color, this should be easy.

Don't worry about blending the top part of the black. We will blend it with our highlight color to get rid of any harsh lines. At this point, I am done with the big part of the shadow.

Using a puffy highlighter brush, apply your highligher color to your brow bone. As mentioned above, I used MSC Xray Spex. I LOVE this color as a highlight. *dies*

Blend your highlight in to your black shadow lightly, using a windshield wiper motion. The color was kind of washed out in this picture, my shadow isn't that grey. Much darker. :)

Using a small shadow brush, I added a little of my Xray Spex to my duct.

Don't forget to be rubbing those lips together!!!

Take your glitter adhesive (I used Victoria's Secret Beauty Rush clear gloss since it is really tacky) and apply a VERY small amount to your finer.

Lightly DAB on your eye, starting from your inner eye out. Apply more sparingly the further out you go, so we get a good glittery gradient into the black. Remember.. you do not need a lot! I just swiped my finger on the top of the gloss tube, I didn't need to get any out of the tube itself.

I use an old concealer brush for this part. The gloss can make your brushes a little, well, unusable between washings. Pick up a good amount of loose glitter on the brush.

Dab heavily on the eyes, working outward. You can't tell in this picture, but the glitter is almost solid. That is why we put the silvery base shadow down, for lights that don't pick up the glitter as well. At this point, you should start to feel like a disco ball.

Play with it until you have a good gradient. I had to add a little more black here and there, a little more glitter here and there. Back and forth until I was happy.

Time to take off the tape! As you can see, you can tell EXACTLY where the tape was....

Using washcloth, makeup remover, or whathaveyou, remove the outlines.

Using a soft brush or your finger, you can soften up the line left by the tape. I only did this a little, since I utilized the line for more glitter.

Using your "glitter adhesive" of choice (lip gloss), use the small detail brush to swipe a line of adhesive along your "tape line."

Use that brush to grab some loose glitter, and go over the line of adhesive you just drew. This will add an extra flash of drama on your eyes. :)

Line your eyes as you normally would. I gave my eye an inner point to add to the dramatic-ness, using my liquid liner, Revlon's Colorstay in Blackest Black. I then used my pencil liner to do my waterline: Maybelline's Line Exact in Ebony Black. I applied my top liner a little thick because of the false lashes I am going to apply. :)

Apply your mascara as you normally would, of if you plan on doing false lashes, just sweep a little on.

This is what we have so far! Again, the light I used washed out the color, it is actually much darker. If you do not plan on wearing false lashes, you're done with your eyeshadow!

If you are applying false lashes, do so! I used some no-name lashes I got off ebay, and Revlon's Precision Lash Adhesive.

Ta Duh!

If needed, fill in your brows for an even more dramatic look. I used my eyeliner since I have black brows, and rarely fill in my brows at all.

I know this is totally out of order for some, but after I do my eyes, I do my face. I do this because every time I do it the other way around, I end up with fall out all over my face, and end up taking most of it off with the fallout. So... uh... do your face!

I took a TEENY amount of my highlight, MSC Xray Spex and put it on my face brush. In a C-shape around my eye, I gently highlighted my cheek & brow bones. I then dusted my face with some Dazzle Dust, just to be more sparkly. :)

Now for the lips. Rub in whatever is left of your balm, so that your lips are moisturized and in their happy place.

Taking a SMALL amount of concealer, apply to your lips. Yes. They will look unhappy, dry, and pretty gross.

Using a light brush lightly dust a little bit of your face powder across your lips to even everything out. Whiting out your lips like this will make your eyes SCREAM for attention. Nude lips are totally in right now!

I then applied a gloss over my lippies. I used a really light pink, just to put a *little* bit of color back into my kisser.

Once you are glossed up... you are done! Let the glamor shots begin!!

What do you guys wear for big party events like New Years?
Be sure to tell me what you think!!!! Opinions are welcome!
Amazing Eige!!! You did a great job with the look and the photos.
ReplyDeleteThank you for the tut! I love this look :D
ReplyDeleteLove this look!! I did a silver/black/glitter look on NYE too!
ReplyDeleteThis is amazing and super easy to follow. I HAVE to try this look out!
ReplyDeleteThis comment has been removed by the author.
ReplyDeleteI love it! and yeh a lot of us did black & silver this new years LOL
ReplyDeleteKahlua .... lip balm?!?!?! *runs off with credit card in hand*
ReplyDeleteyes. kahlua lip balm. you.need.it. it is my favorite ever. *dies*
ReplyDelete